

Once you have completed the Pricing Setup Wizard, it’s time to start building packages. Packages include information about the type of vehicle to be serviced, the services to be performed, how long those services will take, and how much it will cost.
Let’s take a look and see how Packages are built. Start by using the Main Menu on the left hand side of the screen. Scroll to the bottom and click Set Up. Look under the Pricing tab and click Detail Packages.
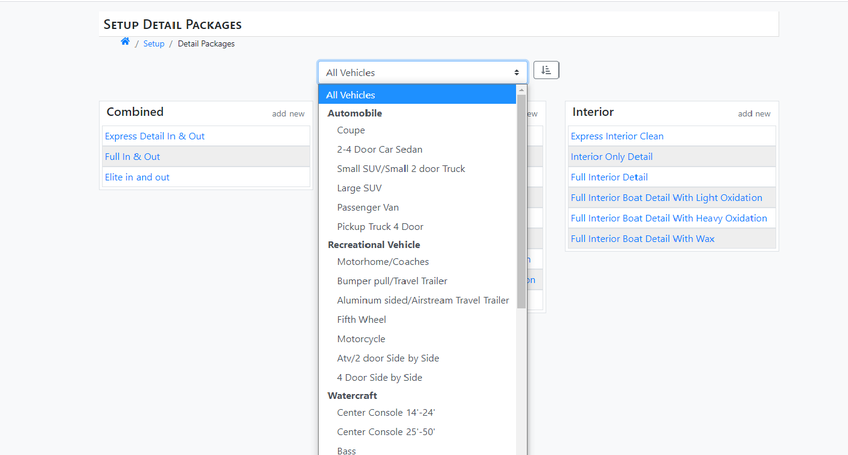
Package Zones
We offer three different package zones, or categories. Exterior Packages offer services for the outside of vehicles, Interior Packages offer services for the inside, and Combined Packages cover services both inside and outside of the vehicle.
Using the drop down menu near the top of the dialogue box, you can choose to view packages for All Vehicles or select specific vehicles to view packages for each vehicle individually.
Package Display Order
To change the way your packages are displayed on the booking website, simply click the downward arrow with lines next to the drop down menu near the top of the dialogue box. This enables the drag and drop feature. Click and hold the lines next to each package option to reorder and reorganize. Once you are done, click anywhere on the screen to automatically save your work.
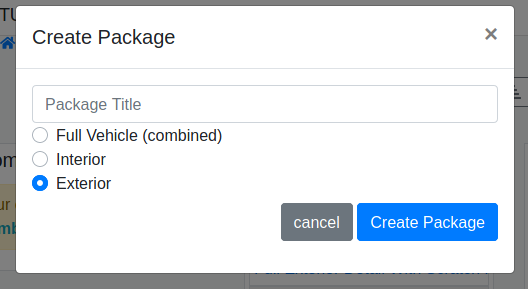
Create New Package
Creating new packages is easy. Click add new next to the Package Zone that best suits the new package you want to build. Add a Package Title and confirm that you have selected the correct Package Zone, then click Create Package.
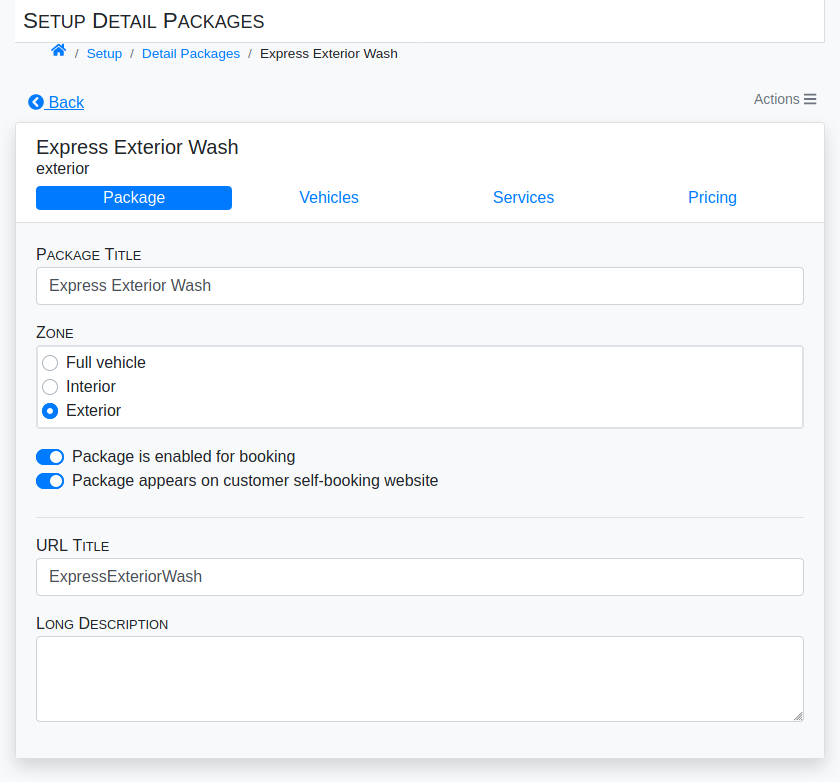
From there, it is time to start adding details and adjust different Package Settings. Confirm the Title, Zone, and automatically generated URL Title are correct. You will also add a Long Description of services included in the package here. This description is visible to customers on your website and acts as your after hours salesman, so while your description does not actually need to be long, it should be concise and meaningful.
Before continuing, use the blue toggle switches to determine if the Package is enabled for booking and if the Package appears on customer self-booking website. If you select the Package is enabled for booking option but do not select Package appears on customer self-booking website, that package can only be booked through the BackOffice.
When you are ready to continue, look for the menu bar with blue text near the top of the dialogue box. Click on the word Vehicles to move to the next screen.
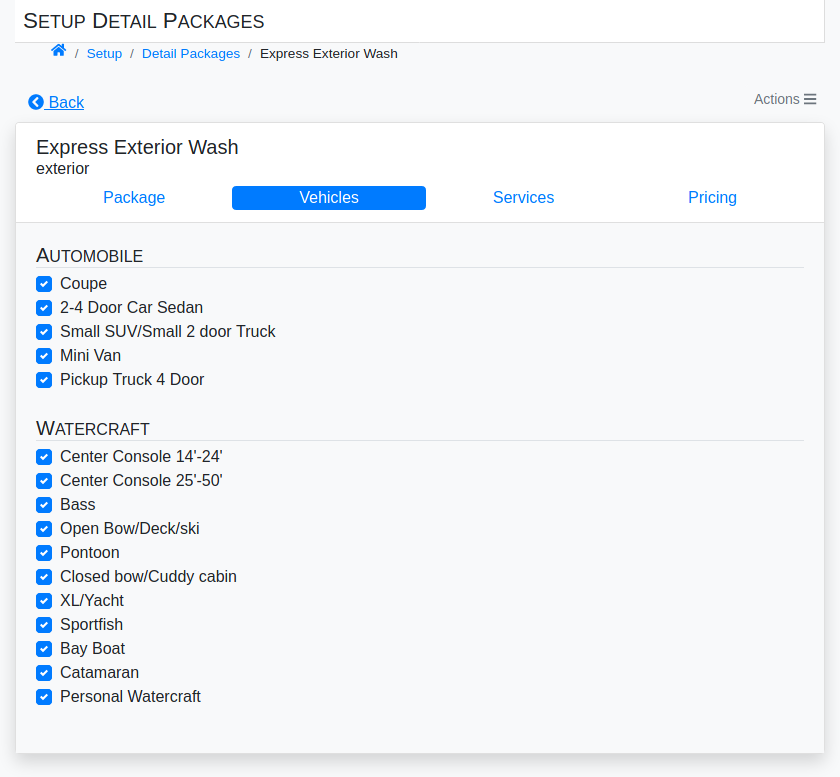
Package Vehicles
On this screen, select which Vehicles go into your Package. Vehicles are listed by Vehicle Zone. Simply add a check to the box next to the Vehicles you want to include in your Package.
When you are done selecting Vehicles, look for the menu bar with blue text near the top of the dialogue box. Click on the word Services to move to the next screen.
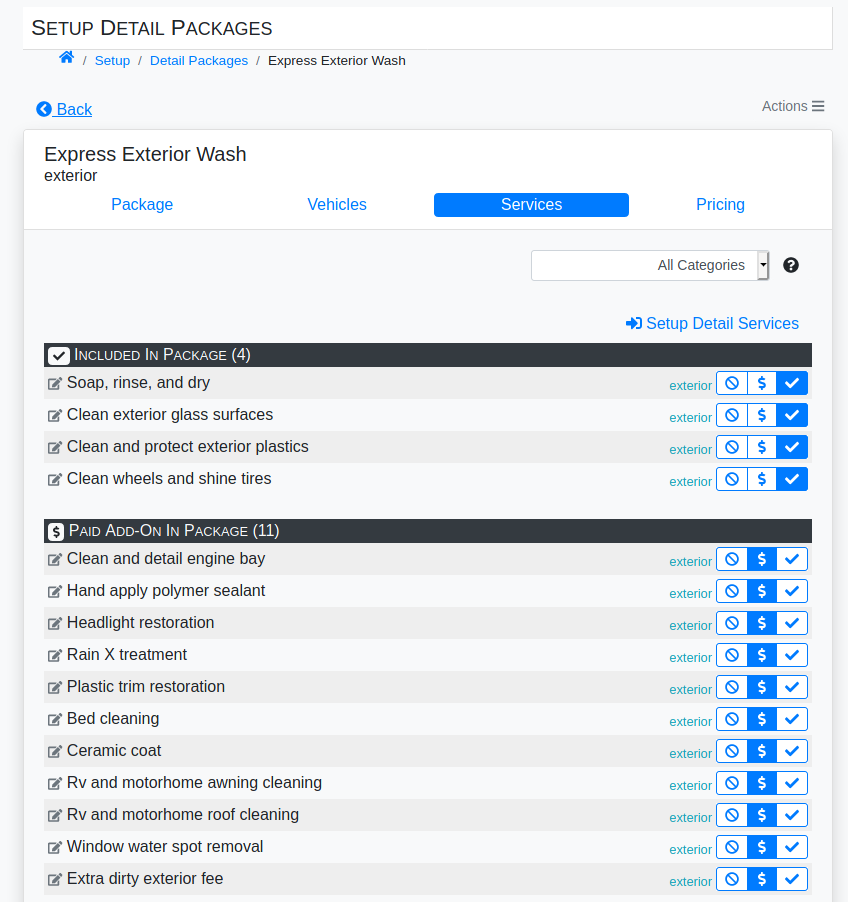
Package Services
Package Services are separated into four categories. Listed first are the Services Included in the Package, followed by Paid Add-On Services, Services that are currently Unavailable in the Package, and Services that are Excluded by Vehicle Type.
Each listed Service has a blue and white selection button on the line next to it. Each button has three selection options, with the current selection highlighted in blue. To add a Service to your package, click the checkmark. To mark it as Unavailable, click on the circle with a line through it. To select a Service as an Add-On, click the dollar sign in the middle.
These options are not available for Services that are Excluded by Vehicle Type.
When each service is listed in appropriate category and you are ready for the next step, look for the menu bar with blue text near the top of the dialogue box. Click on the word Pricing to move to the next screen.
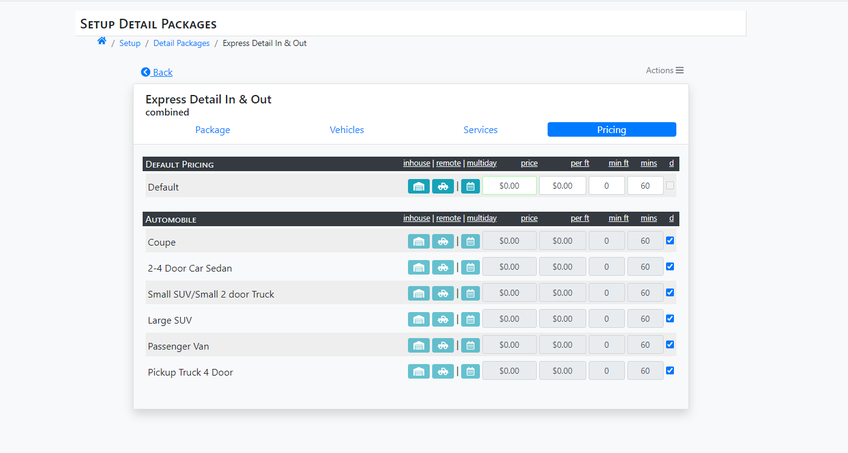
Package Pricing
The last step in setting up your Detail Package is to set the Pricing. The Pricing Page is separated by Vehicle Category, with Default listed at the top. Price can be set as a default package price, by vehicle type, or by the foot. If you decide to price by the foot, you may also decide include a minimum length so that users cannot input an invalid amount.
Let’s start with Default. If you plan to set one price per package and do not plan to change the price depending on Vehicle Type, you will want to set a Default Price. Looking under the Default Category, find where it says Price and click on the text box underneath. Type the desired Price. Next, go down the list and add a check mark to the white box under the “d.” This confirms that a Default Price will be set for each vehicle type.
As you set prices for each package, you will also see a set of green buttons next to each Vehicle Type. These buttons are divided into columns by services that are offered inhouse, remote, or as multiday jobs. These options help determine what time, staff, and equipment is needed for each job.
Once your Prices are set, use the Actions tool located at the top of the dialogue box to Clone or Delete Services.
To build multiple packages at once, start by building a basic package and then use the clone tool to make any desired adjustments.
Job Time
The last step to creating your package is inputting Job Time. Job Time is listed in minute increments and is used to determine how long the overall job will take. This ensures that when you add newly created Packages to the Schedule, that each job will be completed in a timely, organized fashion and that each customer knows when to expect their vehicle.
To input Job Time, first locate the correct service. Follow the line all the way across to the last column, under mins. Click on the box and type the correct time in minutes. Click anywhere on the screen to save your changes.


