How your shop operates will determine how you set up your work bays. Start by choosing the option that best describes your company.
I am a Mobile Detailer. I travel to my customers.
From the main menu, click on the Set Up button, and choose the Work Bays setup page.
Your Software will be preloaded with Work Bay 1 and Work Bay 2. The names can easily be changed by selecting the bay and changing the name. ( i.e. Mobile Unit 1, Mobile Unit 2, etc… )
- If you operate a Single Mobile Unit, either delete or deactivate Work Bay 2 by selecting the Work Bay and either clicking trash or toggling the ‘Disabled’ button & ‘Save Bay’ button.
- If you have multiple units, you can add additional bays by selecting the Add button, creating the Bay Name, choosing On-Site, & saving the bay.
Once you have added your Work Bays, you will need to update your Schedule, Exceptions, and Limits for each one.
I have a Shop. My customers come to me.
From the main menu, click on the Set Up button, and choose the Work Bays setup page.
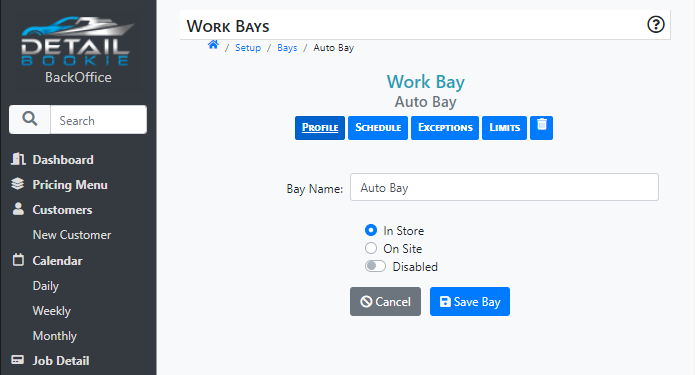
Your Software will be preloaded with Work Bay 1 and Work Bay 2. The names can easily be changed by selecting the bay and changing the name. ( i.e. Auto Bay, Boat Bay, etc… )
- If you only have one Work Bay, you can either delete or deactivate Work Bay 2 by selecting the Work Bay and either clicking trash, or toggling the ‘Disabled’ button & ‘Save Bay’ button.)
- If you have multiple Work Bays, you can add additional bays by selecting the Add button, creating the Bay Name, choosing In-Store, & saving the bay.
Once you have added your Work Bays, you will need to update your Schedule, Exceptions, and Limits for each one.
I have both a Shop and Mobile Units.
From the main menu, click on the Set Up button, and choose the Work Bays setup page.
Your Software will be preloaded with Work Bay 1 and Work Bay 2. The names can easily be changed by selecting the bay and changing the name. ( i.e. Auto Bay, Boat Bay, Mobile Unit, etc… )
- If you have multiple units, you can add additional bays by selecting the Add button, creating the Bay Name, choosing either In-Store or On-Site & saving the bay.
- To remove a Work Bay, Click on the unwanted Bay, Select either Trash or Toggle the Deactivate button, and Save.
Once you have added your Work Bays, you will need to update your Schedule, Exceptions, and Limits for each one.